
If your pool enclosure is screened in, you already know the advantages that mesh pool screens have over glass enclosures. Air circulates freely through mesh screens. Subsequently, it alleviates the “closed in” feeling that many people say they endure inside glass pool enclosures.
Moreover, you’re less likely to have problems with mold and mildew taking hold near the pool because the entire area dries out.
Replacing or repairing a mesh pool screen is a fairly simple task. It may be a job that you’re completely comfortable doing on your own. If you aren’t into do-it-yourself projects, repairing or replacing screens isn’t very labor-intensive as much as it can be awkward trying to complete the process while holding the screen taut.
We’re going to explain the process for you and by the time we’re through, you can decide whether you need to grab a partner and go for it or start looking for a contractor.
Do you have what it takes?
It’s a good idea to take an overall look at any home improvement project from start to finish before determining if you will do the work yourself or hire a pro.
Here are a few good questions to ask yourself when considering whether or not to do the job on your own:
Is it dangerous?
It’s important to consider whether you’ll be working from a ladder. About 500,000 people fall from ladders each year and 97% of those accidents happen at home. Holding tools and materials while you’re balancing on the rungs of a ladder puts you at high risk of being involved in an accident.
And, it could be fatal.
Will you be working with electricity, power tools, or gas lines? If you don’t have experience working around and with any of these things, it’s probably not a good idea to tackle the project yourself.
Does the job require a permit?
If yes and you aren’t an experienced contractor, you may be ahead of the game to hire a licensed professional.
Permits exist to ensure a construction job is done correctly from start to finish—for safety sake. You would never want to put your family at future risk because you lacked the skills and knowledge to complete the task correctly.
How long is this going to take?
Life’s a busy thing and there’s nothing worse than starting a project only to find yourself shoving it on the back burner before it’s completed. I mean, seriously, who knows when you are going to be able to budget the time to get back to it.
If the job can be wrapped up in a day or over a weekend, it will be a fine notch to add to your DIY tool belt! If it’s going to last days, weeks, or even longer, you’re likely better off to put it into the hands of a licensed contractor. Sometimes, putting things off once they’ve been started only causes a bigger problem further down the road.
Do you have the right tools?
Like everything else in the world, when you set out to purchase the tools and supplies you need to complete the job, things add up fast!
Determine what you’ll need for your project, discover what you’re lacking, and do some price checking. Afterward, you may decide that it’s the catalyst that has you scheduling the job with an outside source.
Mesh pool screen repair is a fairly simple project though. Here’s a list of what you’ll need:
• Replacement screen of like size
• Spline
• Spline roller
• Scissors
• Masking tape
• Tape measure
•Utility knife
• Screwdriver (optional)
Repairing a hole
It’s best to get after a small hole in your screen as soon as you realize there is one. In addition to the bug factor, young children and pets tend to become mesmerized by them, don’t they? It doesn’t take much for a tiny hole to become a gaping one after it’s discovered.
If you can reach the hole standing on the ground, that’s great. If not—in light of our ladder discussion above—perhaps it would be a good idea to take the screen down and work with it lying flat on the ground.
Are you a visual learner? You can find lots of how-to videos online that take you through the process step-by-step.
You’ll be using some of the same tools listed above with the addition of a tube of clear silicone caulk.
The process is as follows:
- Access the damage and measure the size of the hole
- Cut the replacement piece
- Trim the edges of the hole with scissors
- Adhere the patch to the screen by dabbing some of the clear silicone caulk onto your fingers and covering the edges of the hole. After the caulk becomes tacky, apply some caulk to the outer edges of the patch.
- Firmly press the patch onto the screen and hold it in place for a few minutes.
- Allow to dry for 24 hours and then trim away the overlapping screen using scissors.
Replacing mesh pool screen panels
If you need to replace an entire panel of pool screen in your enclosure, first, check your warranty! Maybe the company that installed it for you will come out and replace it at no charge.
If it’s not under warranty, this will be where you need to grab that partner that we mentioned earlier. It’s not impossible to handle this job on your own, but it goes much faster—and can be far less frustrating—when you have someone helping you.
Here are our tips for replacing your mesh pool, patio, or lanai enclosure panels:
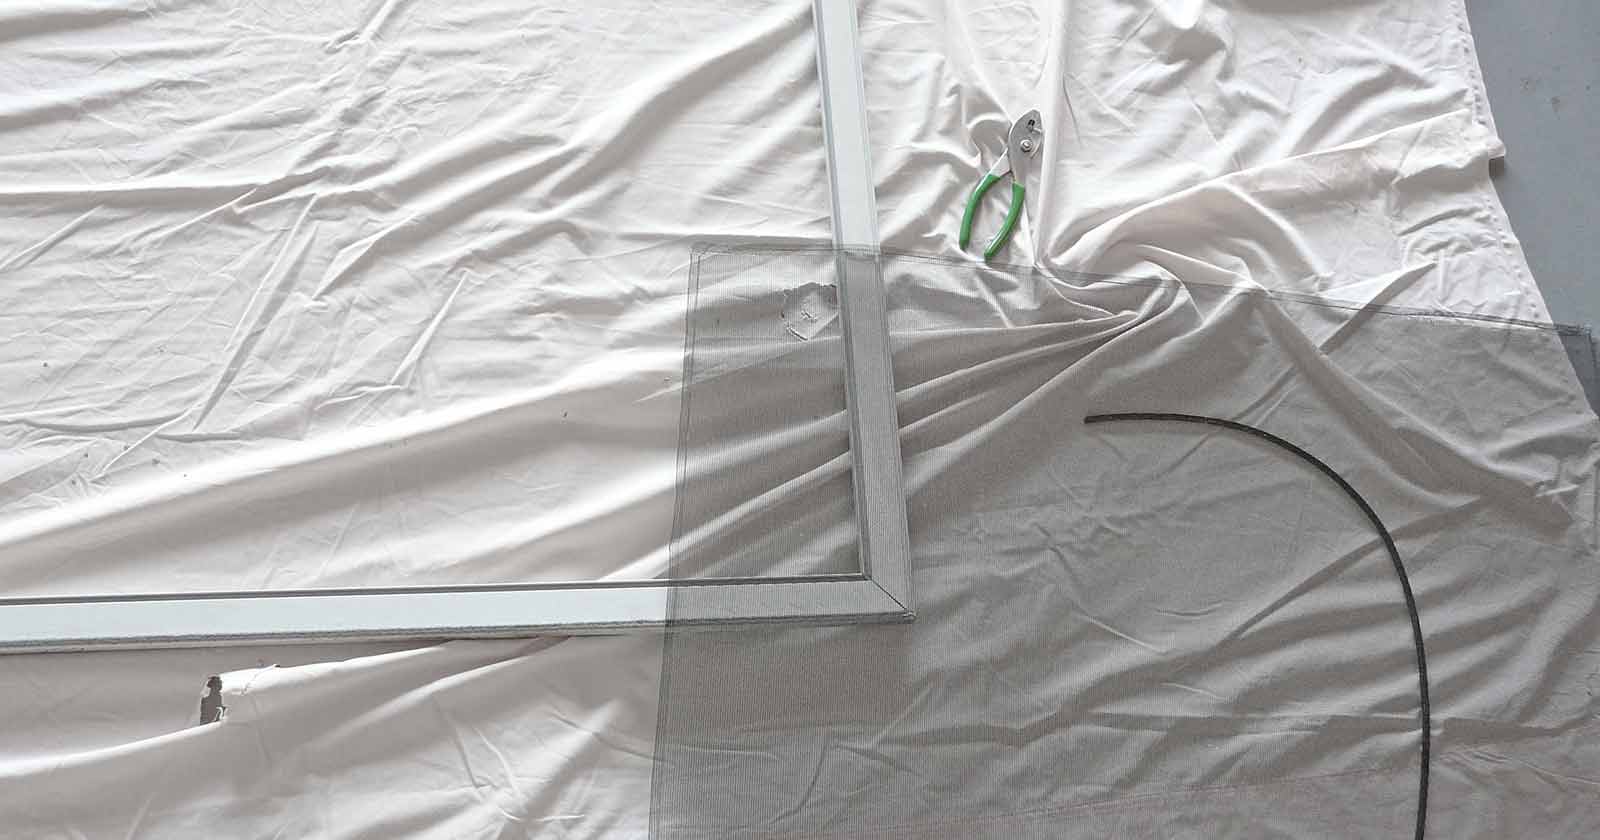
- Remove the damaged screen. Use pliers or a utility knife and release an edge of the spline. Pull it out of the frame. Then, lift the screen out of the frame.
- Use your tape measure to measure the openings of each panel. To do this, place your tape measure along the outside edge of the spline channel. Measure down the length and then across the width of the opening. It’s best to add two or three inches to each side for allowance.
- Roll the new screen out on a flat surface. Cut to size using your utility knife. You can use a yardstick or piece of lumber as a straight edge to guide your cut.
- Roll the newly cut screen in place over the opening. Leave at least one or two inches of excess screen around the edges.
- Hold your spline against the edge of frame. Use your spline roller to press the spline against the screening material and into the groove in the frame. Have your partner help you stretch the screen tightly to ensure a firm application.
- Go completely around the screen inserting the spline into the frame’s groove.
- Before you cut the spline cord, make sure that the screen is installed tightly
Comments are closed.