
We all know that children and pets can be hard on pool screens at times—especially if they discover a small hole or tear. After that, it can seem to become a bit larger each time you look at it, can’t it? Even if they’re spared a fairly constant barrage of small vehicles being driven over them or pets determined to make their way through, there comes a day when it’s time to replace the pool screens.
If you’re an accomplished handyman, this is a job that can easily be tackled over the weekend. And, depending on the size of your enclosure, of course, you may get the job done in just one day.
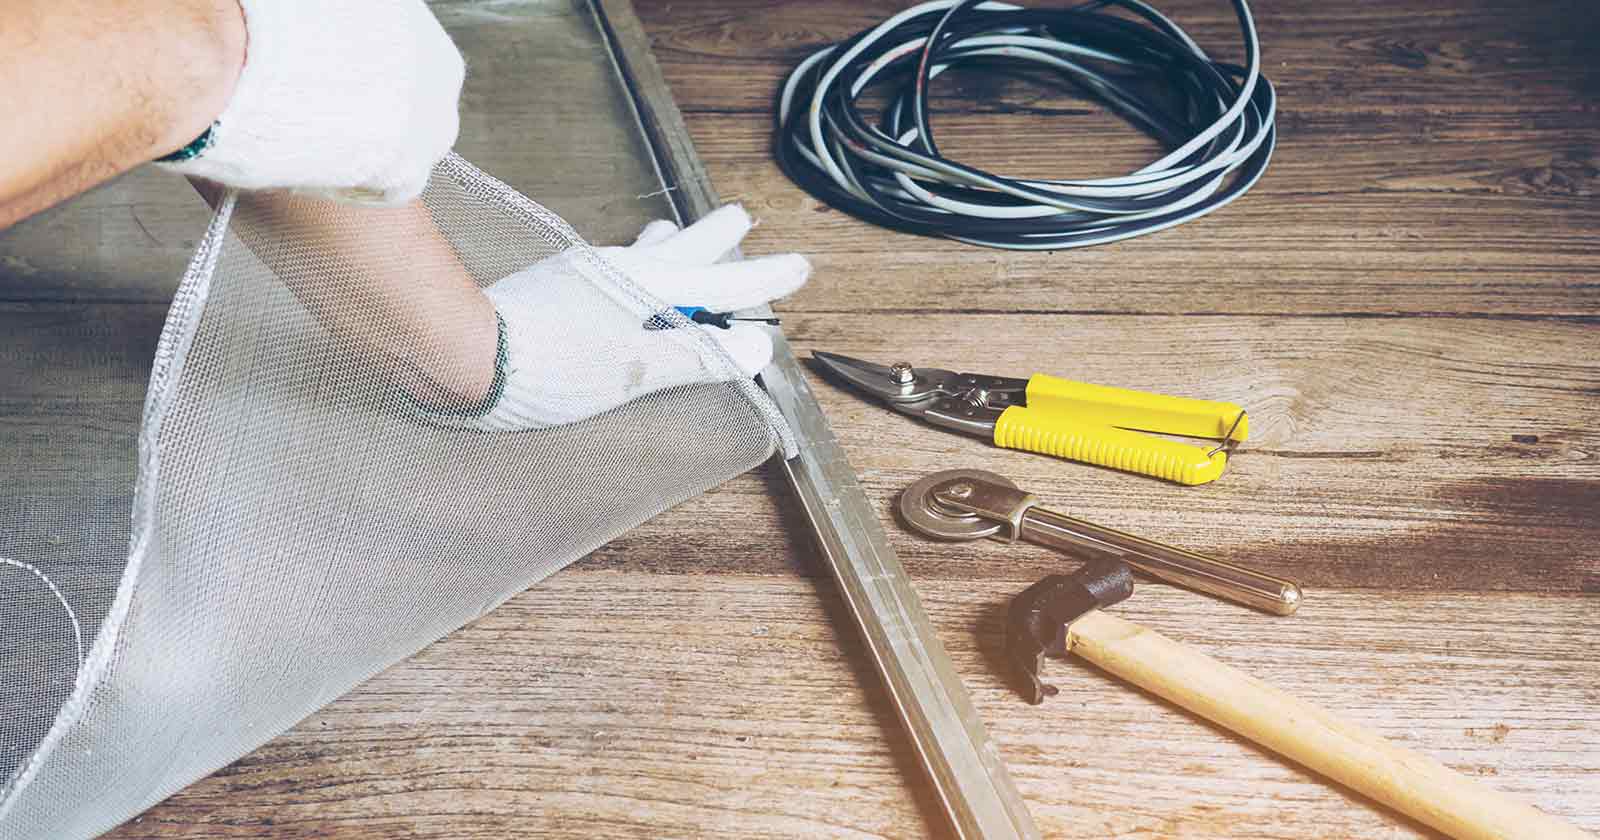
Gather the goods
Most homeowners don’t keep rolls of pool screen stored somewhere around the house as a “just in case” measure. So, your first step is to figure out how much screen you need to complete the job. Once you’ve done the math, you’re ready to head down to the home improvement store to get what you need.
If you’ve replaced screens before, dig out your screen spline roller. If you don’t have one, grab it while you’re out getting your new screen. Grab a piece of the old spline to take along with you. It makes choosing the new spline an easier task.
You will also need a pair of scissors, a flat-head screwdriver, and a utility knife. If working alone, you should also have some form of gripping device handy to help anchor the screen tautly as you work.
When choosing your new screen material, stay away from Artisan wire screen products. The wire is very thin and the salt air and high humidity levels here in Florida make short work of it. Aluminum screens hold up better than the Artisan wire, but mesh screens constructed of fiberglass are our best choice. The finer the weave the better if you want to make sure insects aren’t able to get through it.
There are also screens designed to withstand the weight of pets pressing against or pawing at the screens in attempts to get through them. And, while likely the most expensive choice, solar screen filters ultraviolet (UV) rays lessening their effect. That’s good for you and your stuff.
The installation process
There are four basic steps involved in replacing your pool screens. Due to their large size, it’s best to completely take down the frame and lay it on a firm, flat surface, such as a concrete driveway, perhaps.
Remove old screen
Once your screen is on a flat surface, use your flat-head screwdriver to carefully pry the old spline out of the groove. Once you’ve got it started, you may be able to remove the spline in one solid piece. Now, you can easily remove the old screen and discard it.
Roll out new screen
It’s best to work with a buddy because the large size can make it awkward to work alone. You can save time and alleviate frustration by enlisting a helper.
Unroll your new screen material onto the frame, anchoring one side down to hold it in place if necessary. You want to make sure you have the correct measurements before you cut your new screen piece. Leave a few inches of extra screen on the sides of your frame, then, take your scissors and cut the new piece from your roll.
Install new spline
First and foremost, the new screen needs to be taut to give you the best performance and lifespan. Your helper can keep the screen pulled tightly across the frame as you work. If working alone, use pliers or some type of clamps and stretch the screen tautly across the frame. Anchor in place.
To get started, position the end of the new spline on top of your screen directly above the groove. Use the flat-head screwdriver to push the end firmly into the corner of the groove.
With one hand gently stretch the spline while using your other hand to apply downward pressure on the spline tool. Use a back-and-forth movement to ensure the spline is firmly inserted into the groove. Keep pushing forward until you reach the corner of the screen’s edge.
Use the flat-head screwdriver to firmly insert the spline in the bend of the corner before continuing with the spline roller and back-and-forth motions. Continue this process until you have returned to your starting point.
Remove excess screen
To remove the unused edges of the screen, place the blade of your utility knife between the spline and frame and carefully trim away the leftover portion. Repeat this process on the other sides of the screen and done!
Bring on the next.
A word of caution
If your pool enclosure is large enough to accommodate a diving board, it’s going to be more of a challenge to install new screens. Working from ladders adds an element of danger to the mix that may not be worth the risk.
You may want to consider hiring a company to take care of the installation for you. We’ll mention, too, that lots of companies customize the screens using digital imagery. You could create an entirely new atmosphere in the pool area just by replacing your screens.
We’ll leave the decision of whether or not to tackle large pool enclosures as a weekend handyman project or not up to you. After all, you know your level of expertise and we’re going to trust your judgment.